Manage Assets
Overview
When you log into the Admin Panel, the Assets page appears, which lists all the Assets, managed on your NFTs solution.
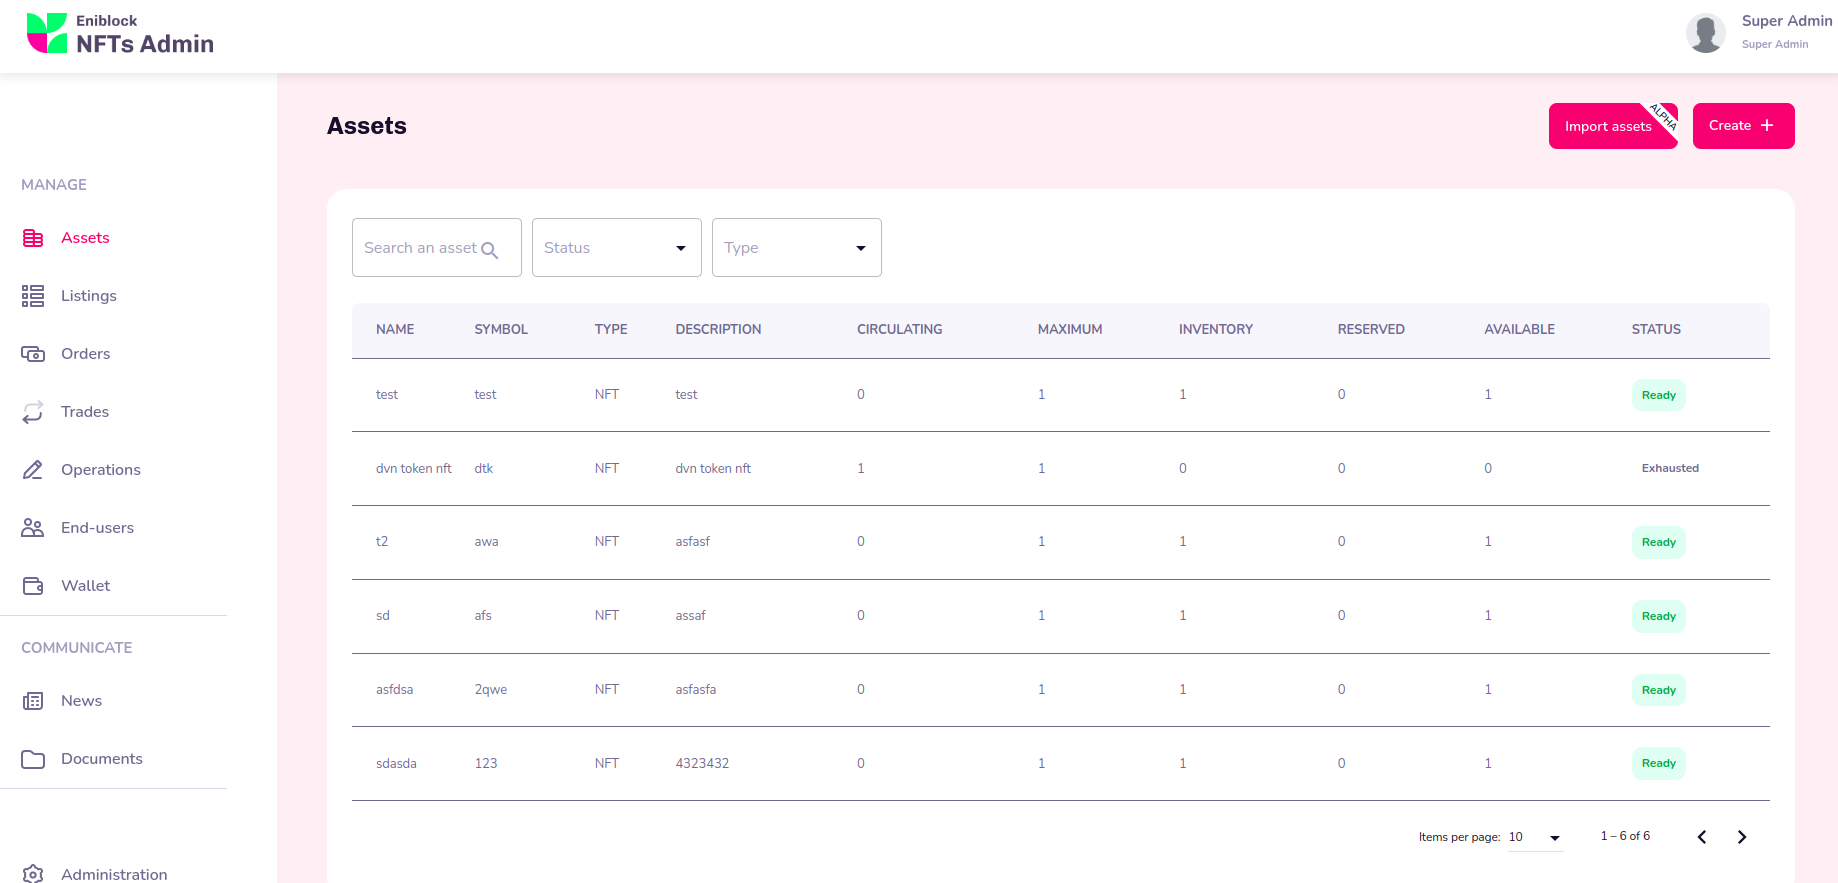
The Assets module enables you to create and manage your Assets and perform key operations such as:
View the Assets list
Search for an asset
Create Assets
using a preconfigured asset template suited to your needs to create assets one by one
using the import Assets feature to create them in Bulk (Alpha feature)
Update existing Asset information
Create Listings from your Assets for your End-users Marketplace.
View the Assets List
The Assets List displays all existing Assets.
The list is sorted in descending order, with the oldest Assets on top of the first page to the most recently created Asset at the end of the list on the last page.
The table displays the following information for quick reference:
Information | Description |
|---|---|
Asset Name | Name of the Asset |
Asset Symbol | Ticker Symbol for the Asset |
Asset Type | Asset Type can be NFT or SFT. |
Description | Short Description for the Asset. |
Circulating | Quantity of Tokens in circulation: |
Maximum | (For Multiple NFTs of FTs) |
Inventory | The Quantity of Tokens that can still be Minted, i.e. the Maximum Number minus the Number in Circulation |
Inventory Reserved | The Quantity of Tokens that have not yet been Minted, but have been integrated into a listing are reserved awaiting to be purchased and minted Example |
Inventory Available | The Quantity of Tokens that can be immediately Minted, taking into account Tokens that have been Reserved |
Tags | The List of Tags that describe the Subject or Content of the Asset |
Status | The state of progress, or Lifecycle of an Asset (please see the Asset Status Section below for further details) |
Search for an Asset
To help find your Asset more easily, you can use the Search Bar at top of the list. You can use filter by:
Asset Name or Symbol
Asset Status
Note: To quickly find Assets that are in Draft or Ready Status
Asset Type

Asset Status
The Status Lifecycle of your Assets helps you organise the issuance of your Assets:
To edit any information, your Asset must be in Draft Status
To use your Asset
The Asset Status is changed:
Manually from Draft to Ready
The Asset Creation or Update is complete and the asset is ready to add to a Listing or MintedAutomatically from Ready to Exhausted/Discontinued
The maximum number available for the Asset have already been Minted
Status | Description | Next Step | Notes |
|---|---|---|---|
Draft | [Default Status] | Manually change the Status to Ready |
You cannot yet create Listings but you can edit Assets as long as they are in Draft Status You can duplicate asset only in draft mode. |
Ready | The Asset design is complete, details are now set to non-modifiable | Create a Listing | Once in Ready Status, the Asset can no longer be reverted to Draft Status: |
Exhausted | You have reached the maximum number of emissions for this Asset. | To mint more of this Asset, you must duplicate the Asset to create a similar one. | This status is definitive This Status does not apply |
Once you have finished editing and updating your Assets, you can change their status from Draft to Ready and create Listings, see Set Asset to Ready Status.
When you change the Asset status from Draft to Ready a confirmation message warns that the Status change is irreversible.
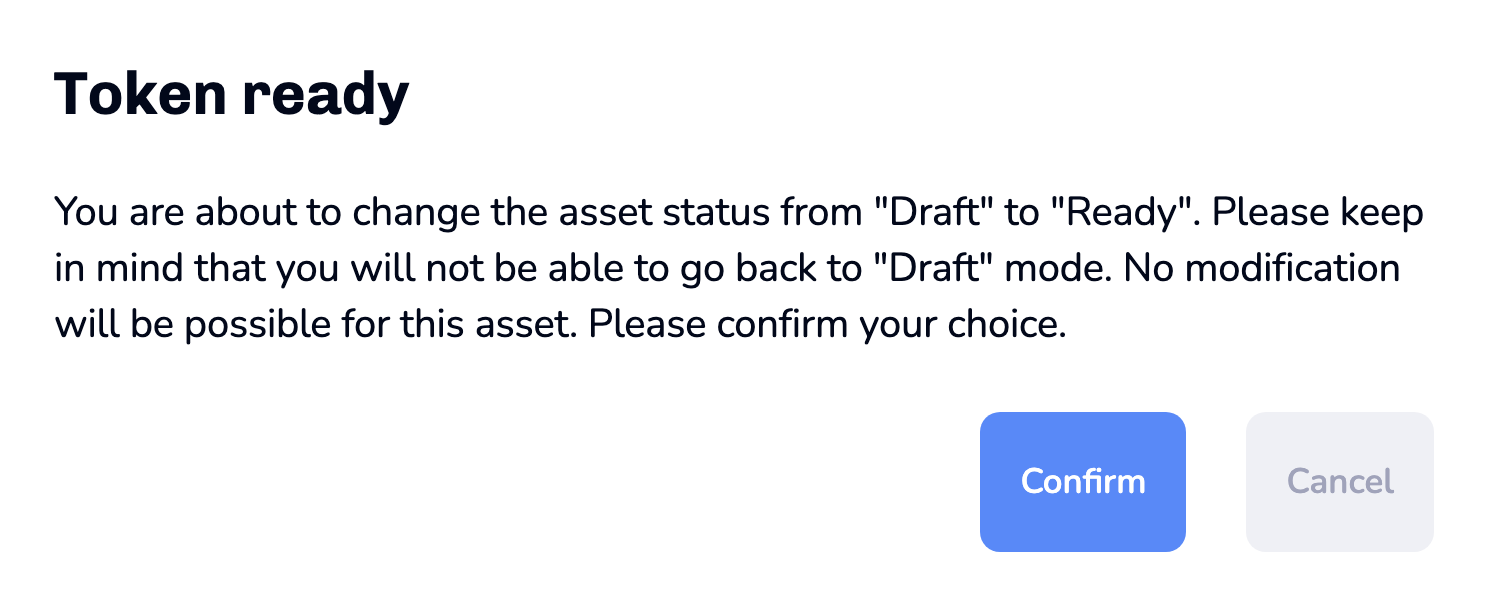
When you click Confirm your Asset changes to Ready status your modifications are automatically saved.
Create Assets
Create a New Asset via Templates
You can create a New Asset using the available pre-configured Asset Templates, such as Player NFT or Club NFT.
Please note that one Asset template refers to one token type. In other words, one asset template will allow you for instance to create NFTs or SFTs but not both.
Click on the Create + button at top-right of the page

Select your desired Base Asset Template from the available
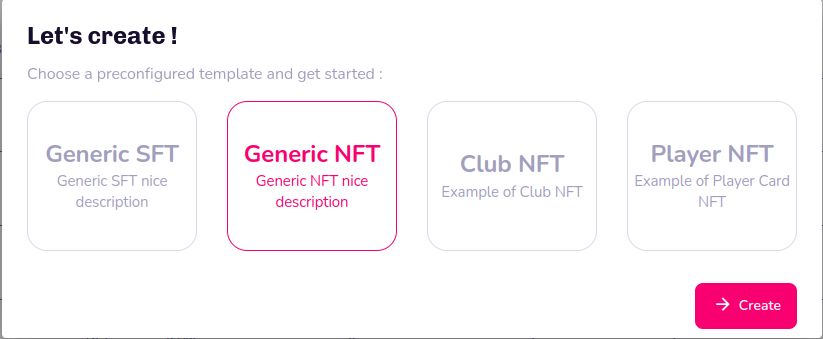
Fill-in the Base Asset Template fields
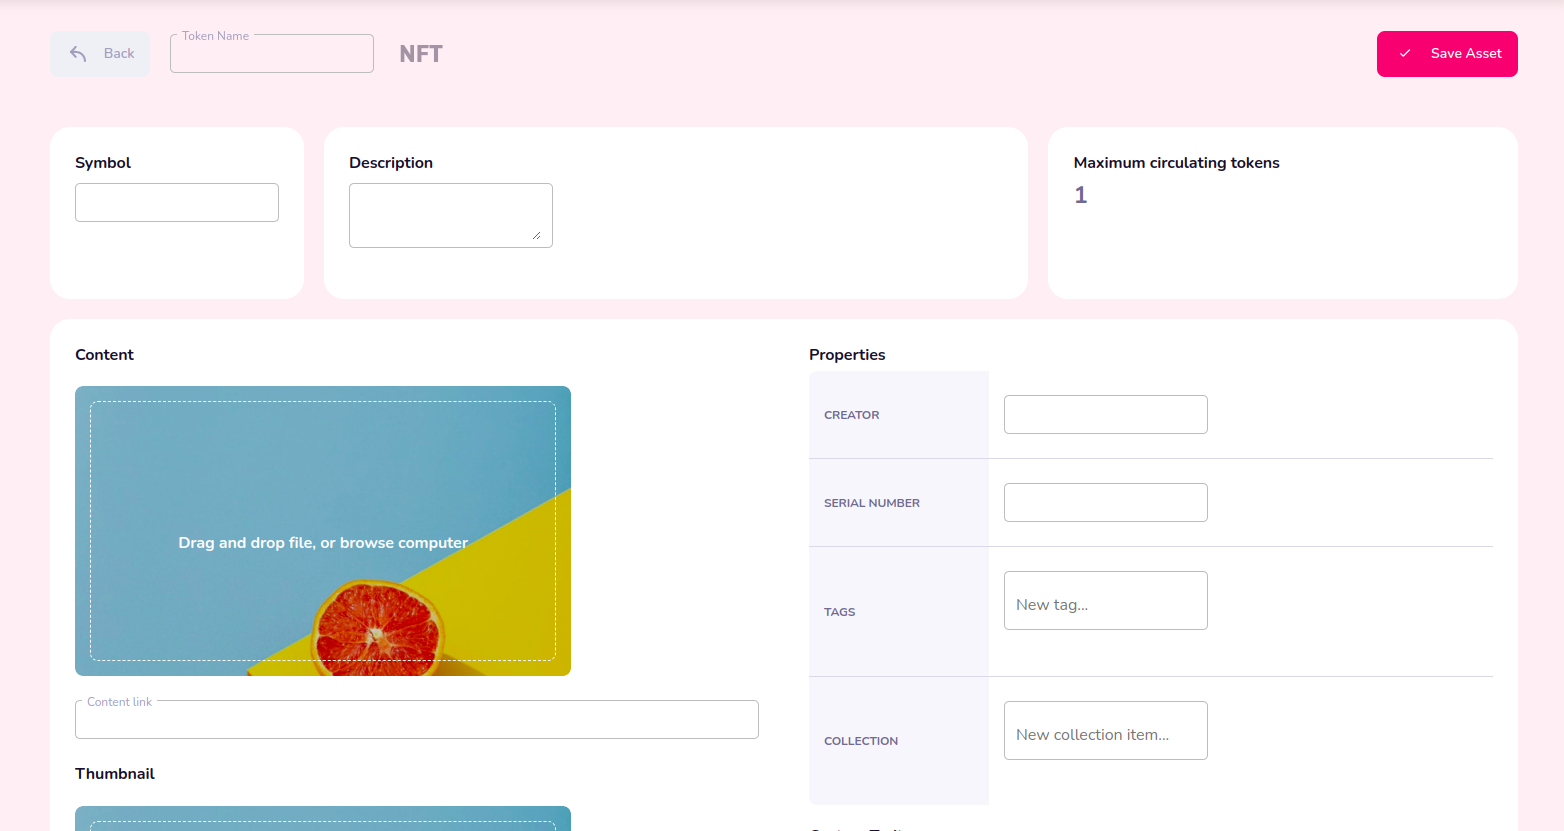
Click the Save Asset button when you you're finished.

The list of fields and whether or not they are mandatory is determined automatically according to the template selected

If any mandatory fields are still required, they will be highlighted when you click the Save button. Fill these in and click Save Asset again
Assets can be updated and modified as long as they are still in Draft mode, please see the Asset Status section for further information on statuses
Create Asset by duplication
Click on the asset, in status DRAFT , that you want to duplicate.
Click the 3 vertical dots menu at top right and select
Click on Duplicate Asset

4. A new duplicated asset , in status DRAFT , will appears on the list of asset.

5. You can now View or Update Asset Information
Create assets using the Import bulk feature via CSV (Alpha)
You can bulk import multiple Assets with associated Context, Traits and Metadata via a preconfigured CSV Flatfile, packageed with the content associated to each asset is a ZIP file.

Click on Import Assets at top-right
Click on the '+' cross in the resulting window to browse for your CSV or drag & drop it directly onto the window
Click Import
Format for asset and listing import ZIP file
When doing an import of asset with or without listing them the following a ZIP file containing the following resources is expected:
a asset description CSV Flatfile named asset_description_[base_template_id].csv . Please click here for an example .
External code;Name;Symbol;Serial number;Description;Creator;Content;Thumbnail;Generate simple listing;Listing Type;Listing from;Listing to;Listing price;Listing active;Tags;CATEGORY_1;Trait 1;Trait 2;Trait 3;Trait 4
GEN_001;GEN_001;GEN;1/150;This is a nice 35 characters descrition;Eniblock;GEN_001.png;TN_GEN_001.png;yes;FIXED_PRICE;2023-02-14T10:00:00Z;2023-02-20T10:00:00Z;2;yes;NFT,Generic,Example;CATEGORY_1_ITEM_A;short;mediumvalue;largevaluevalue;extralargevaluevaluevalueFor boolean fields please be sure you use lowercase boolean : yes or no
Use semicolon as CVS separator.
Use colon as separator for list fields like TAGs
You should not change the order of the fields.
every content file of each asset named as in the csv file. i.e GEN_001.png
every thumbnail of each asset named as in the csv file. i.e TN_GEN_001.png
You can download a ZIP example here.
Configuration parameters are currently unavailable for this feature as it is currently in Alpha testing phase. For any questions on this feature, please raise a request on our Customer Portal
View or Update Asset Information
You can only modify Asset metadata while in Draft mode. Once in Ready or Exhausted status, you must create a New Asset again to change this information, please see the Asset Status section
When you click on an Asset, the details and information page appears for the selected Asset, displaying by default the General information tab.

The page displays at top:

The Asset Name
The Tabs allowing you to navigate through the following pages about the Asset you are browsing:
General: All metadata and information relating to the selected Asset (see Create or Update Asset)
Listings: Information about any listings created from the selected Asset
Transactions: The history of transactions relating to the Asset
Owners: Who owns the asset, their account, wallet address, etc
Symbol and Description of the Asset
Details about the Inventory for the selected Asset:
The number of Tokens of the Asset that have been minted out of the total number that are in circulation
The total number of Inventory that are available or that have been reserved
At left
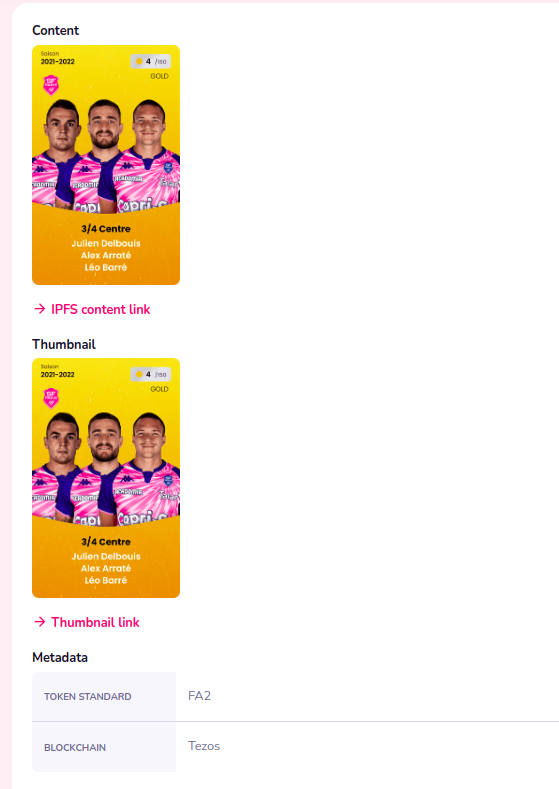
Media Content and Thumbnail of the Asset
Smart Contract metadata
Token standard implemented : https://tezos.b9lab.com/fa2
Blockchain protocol where the smart contract has been deployed.
At right:
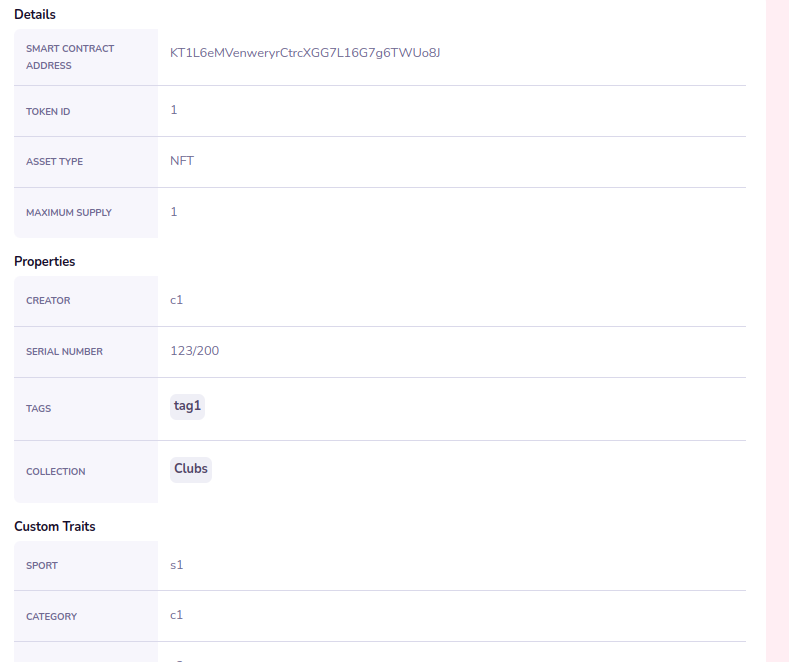
Details:
Smart Contract Address, Token ID, Asset Type, etc.
Properties:
Creator, Serial Number, Tags, Collection
Custom Traits
defined per Base Asset template.
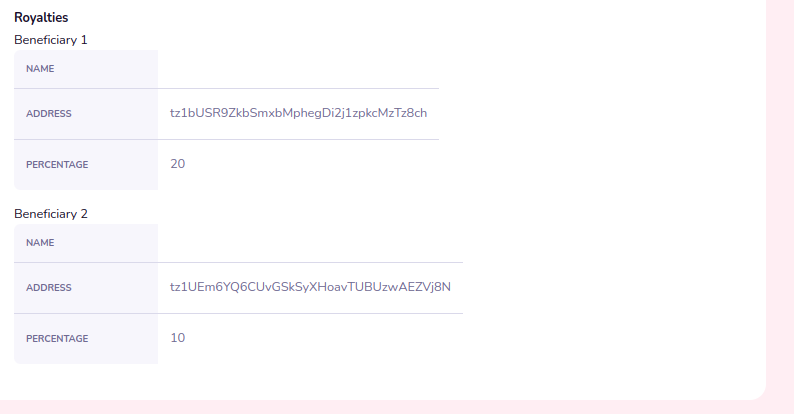
Royalties
View & Edit Asset Name
The Asset Name appears at top-left of the Asset Details page, on the General tab.

To edit this field:
Click the 3 vertical dots menu at top right and select
Update Asset
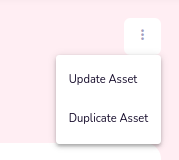
In the General tab, click on the Token Name field and update the contents as desired

Click Save Asset at top right
View & Edit Asset Symbol & Description
The Symbol and Description fields display the information recorded on-chain
The Symbol and Description fields are located below the Name at top-left of the General tab.
To edit this content:
Click the 3 vertical dots menu at top right and select
Click Update Asset
Click the Symbol or Description field and make any necessary changes
Click Save Asset
View & Edit Asset Media Content & Thumbnail
Content
The Content is the actual media content of Asset. This can be graphical representations of your player cards, photographs, images, animations, videos or music in high-resolution.
The Content is represented on-chain as a link towards the place where the high-resolution file is stored.
To upload or replace your artwork Content:
Click the 3 vertical dots menu at top right and select
Click Update Asset
Click on the space under Content
Browse for and select your desired content
Click Save Asset
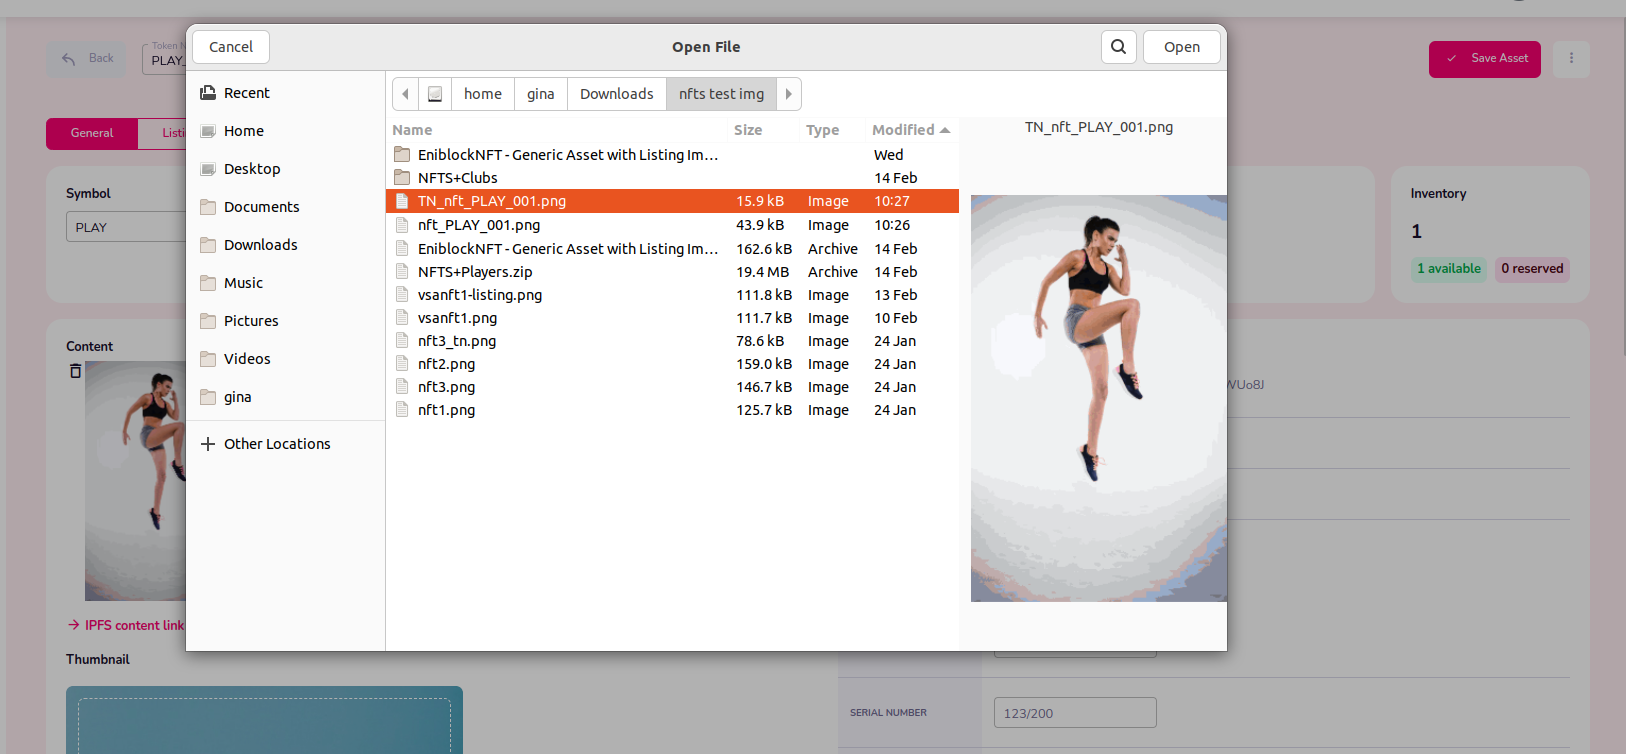
Thumbnail
The Thumbnail is a low-resolution image used as preview image to represent your NFT on the Marketplace. It can represent your card or be any image, video key-frame or any low-res picture of your choice.
To upload or replace your Thumbnail:
Click Update Asset
Click on the space under Thumbnail
Browse for and select your desired image
Click Save Asset
This will be the only image displayed when listing an asset.
Links
Links to the locations of your Content and Thumbnail are automatically included under their graphical representations.

Content links
View & Edit Properties
View & Edit Properties
Click the 3 vertical dots menu at top right and select
Click Update Asset
Fill in the information under Properties at right as appropriate, including common properties to all templates.
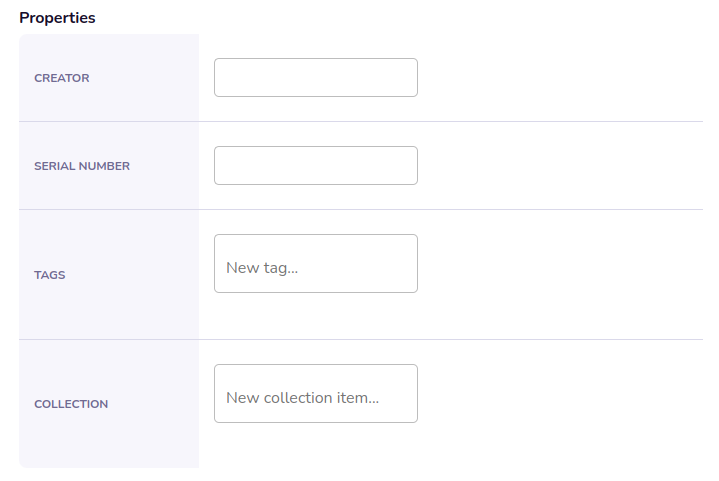
Properties | Description | Example |
|---|---|---|
Creator | Asset creator, it is usually the name of the application owner. | Eniblock |
Tag | The List of Tags that describe the Subject or Content of the Asset. Tags are recorded in the asset metadata to ease search. | RARE You can add a new tags by ENTER in the text field after each tag |
Serial Number | Version number of the token | (1/200) For version 2.13 and highers please use SFT templates if several tokens are required. |
Collection | Associated collection item to the asset. | Generic. |
if any of this properties is not displayed when creating the asset, is because the property was setted as NOT visible during the template configuration.
4. Click Save Asset
View & Edit Custom Traits
Click the 3 vertical dots menu at top right and select
Click Update Asset
Fill in the information under Custom Traits at right as appropriate, please note that traits will entirely depends on each template predefined for an specific solution.
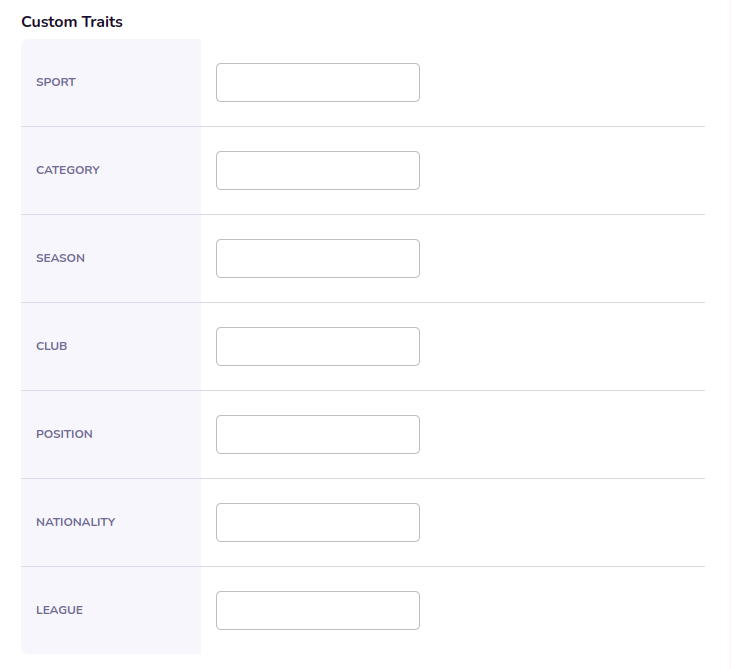
Click Save Asset
Custom traits values can be mandatory if the traits has been set as required in the base asset template.
if you choose a Trait named as an asset properties i.e Creator. There will be two asset attributes with the same name when displayed the asset in the market place.
View & Edit Royalties
Royalties are a specific amount paid to a specific address that happen on all exchange in the secondary market. The amount paid is a percentage based on the sale of an NFT in XTZ.
Click the 3 vertical dots menu at top right and select
Click Update Asset
Edit, Add, Remove asset royalties.

If you click on + Add to add you must fill in the information under Beneficiary 1

Name of the beneficiary : Name
Wallet public address of the beneficiary : Wallet address
Percentage of royalties : Royalties percentage
5. if you click on Trash Button close to each Beneficiary, a confirmation dialog will appears
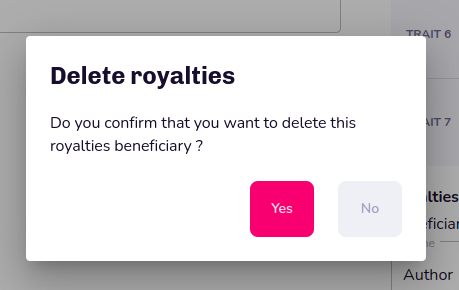
If you want to confirm the deletion, click of YES. Otherwise, you can click NO to close the dialog and maintain the beneficiary.
View Template and Blockchain Data
Asset Details
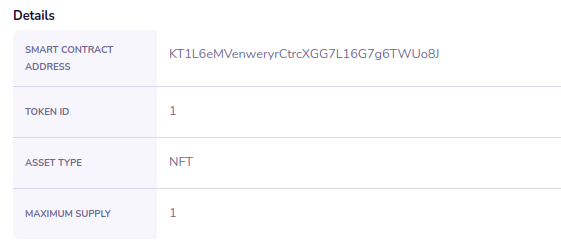
When you click Save Asset, your Blockchain provider automatically generates a Details section at right of the page:
The associated Smart Contract address, and
A unique Token ID
The Details section also includes a reminder of the Asset Type and maximum supply of the Asset.
Asset Base Template Data
The information of the asset template chosen when creating the asset will be available under the Content & Thumbnail Section.

the asset template ID it will be useful when Create assets using the Import bulk feature via CSV (Alpha)
Smart contract metadata
The Token Standard and Blockchain protocol of the smart contract automatically generated under the Asset Templates section.

The Details , Template and Smart contract metadata content is read-only: t cannot be modified even by Super Administrators
Set Asset to Ready Status
Once your Draft is correctly configured, you can set your Asset to Ready status to generate Listings of your Asset on the Blockchain.
To set your Asset to Ready Status:
Locate and double-click on your desired Daft Asset on the Assets page
Click on Draft at right of the Asset Name field to open the drop-down menu
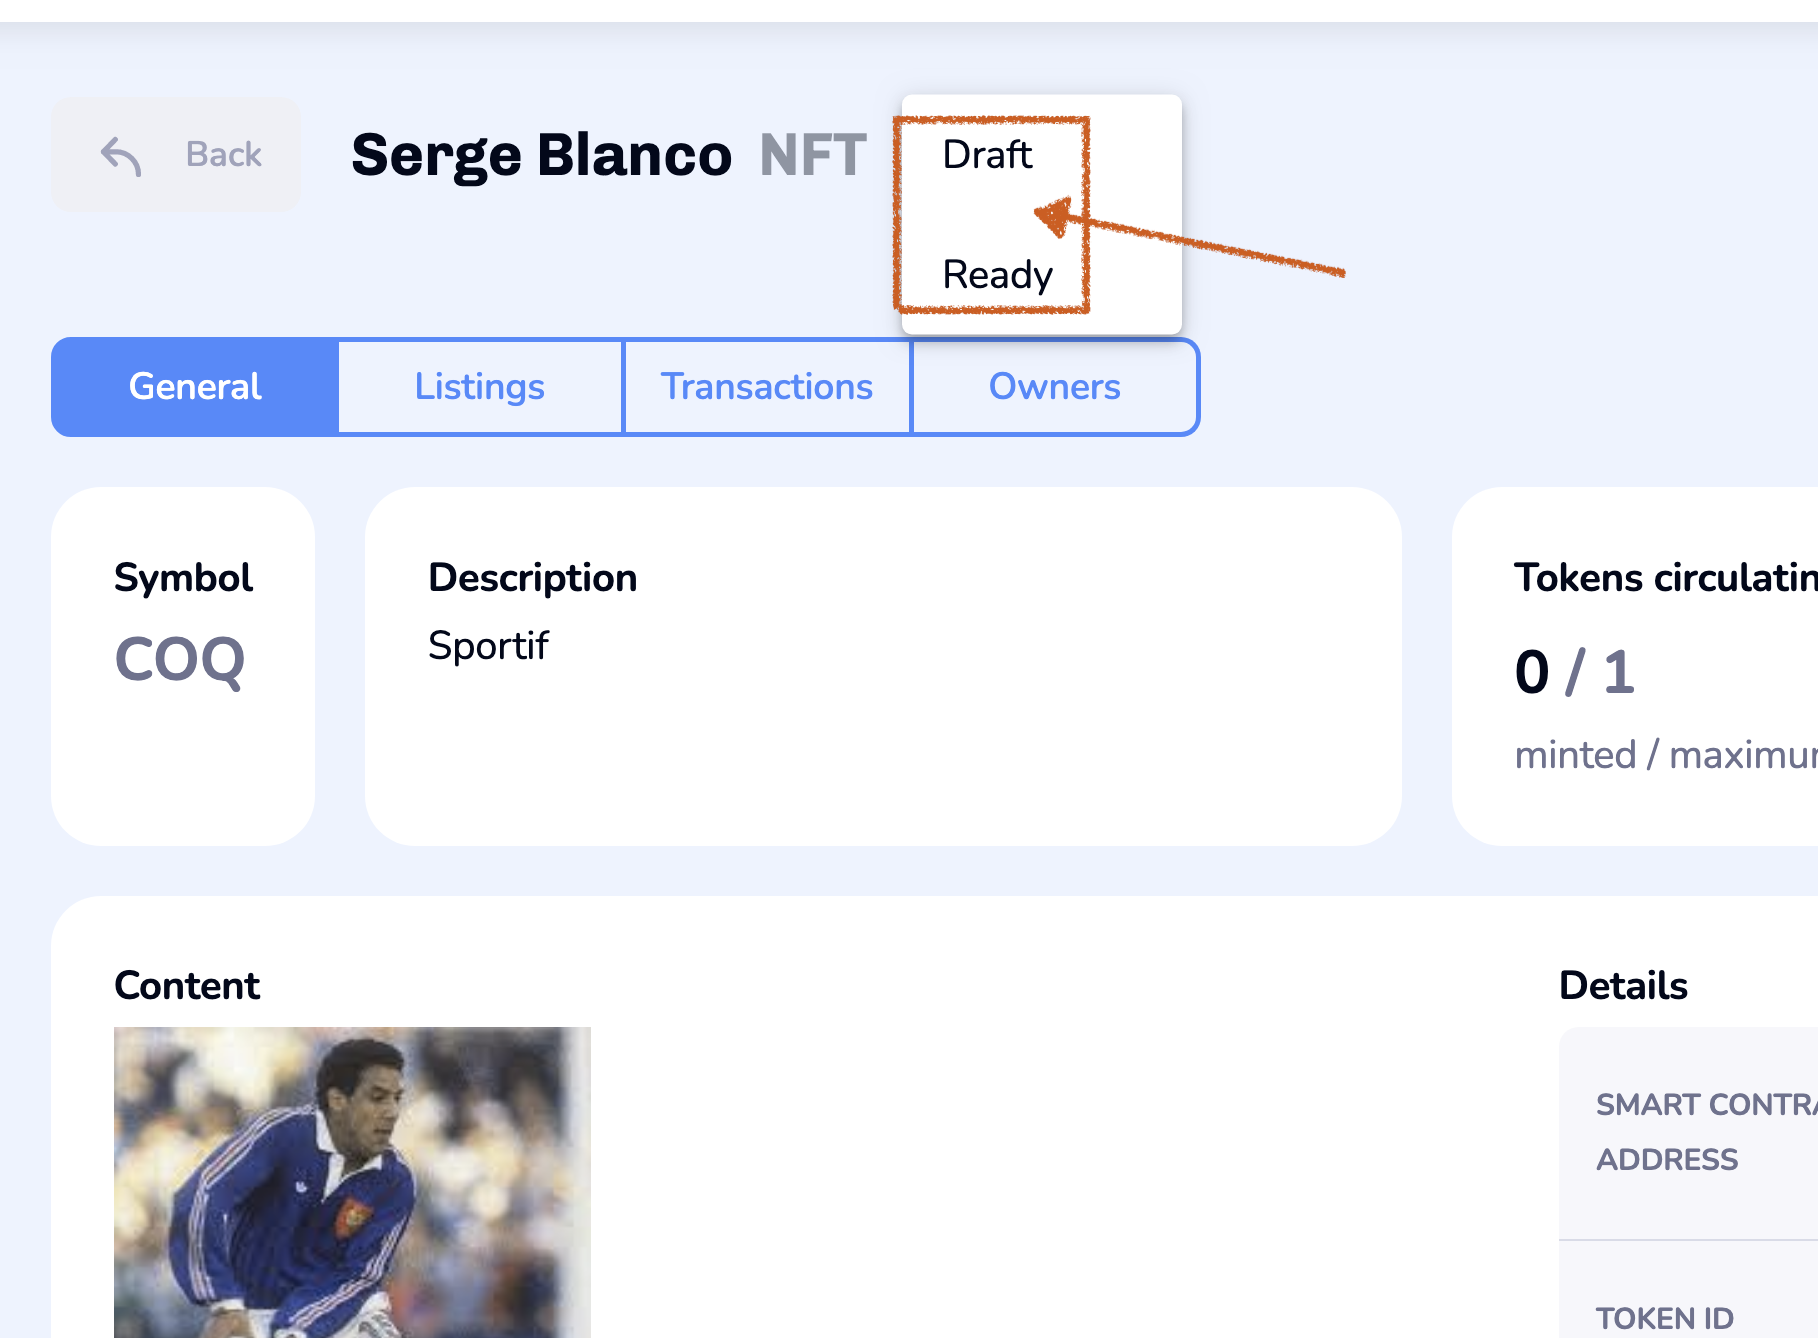
Select Ready
The Token Ready confirmation screen appears to make sure you understand that the Asset is no longer modifiable in Ready Status
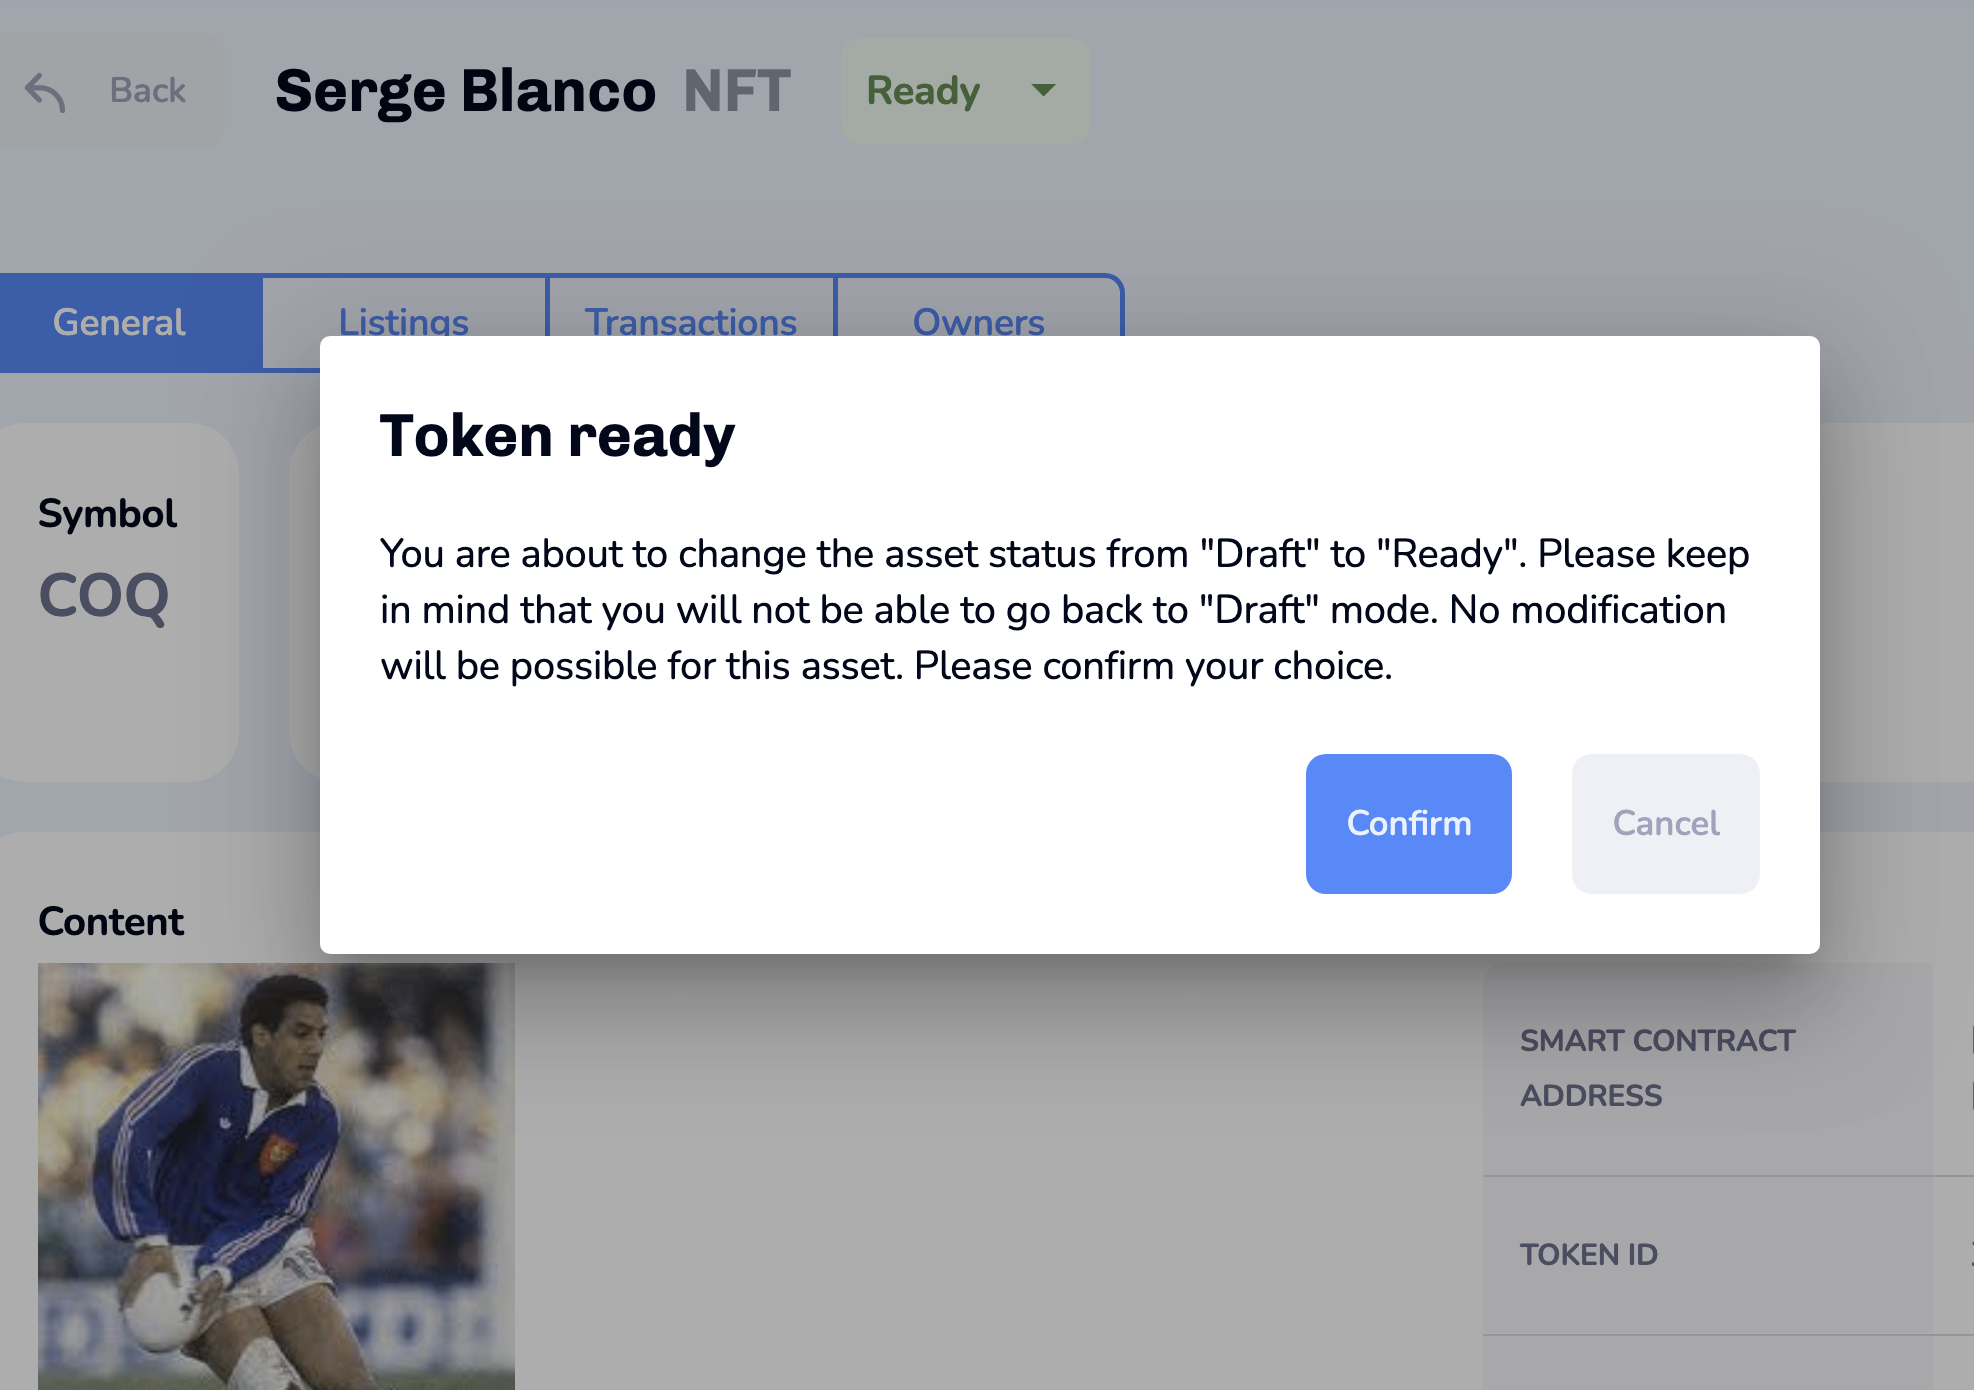
Click Confirm to complete the action
As soon as the Asset is in Ready state, a List button appears at top-right. You can use the List button to create a Simple Listing directly.
Create Listing from Asset
To create a listing from the Assets Detail page:
Double-click on the Asset in Ready Status of your choice
Click the List button at top-right

On the Create Simple Listing page
Fill-in all the fields accordingly (see table below for Field Descriptions)
Click Save
Clicking on the Back arrow from here takes you to the Listings page
Field Descriptions
Field | Description |
|---|---|
Listing Name | Name for Listing |
Sales Type |
|
Starting Auction Price | Price of Sale (Euros) |
Currency | Select your choice (EUR) |
Description | This is an open text field for you to describe your listing to the World! |
Listing ID | Listing Identification Number |
Start Date / End Date | Time Period for the Listing Sale to be Live Listing periods cannot be longer than 167 hours |
Start Time / End Time | (English Auction only) Specific hour values for the Listing to be Live |
Set Date & Time
Click on the Calendar icon to select the Start/End date for your Sale
Click on the clock face icon to open the Time Picker
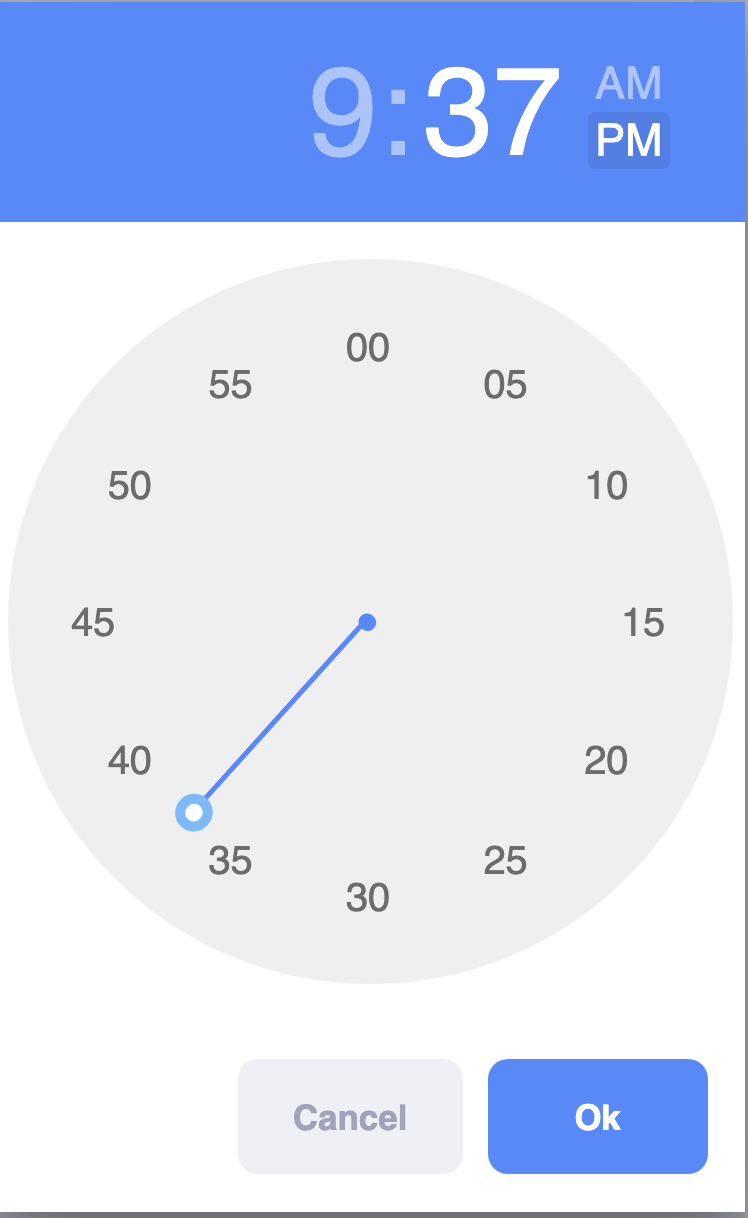
Click on AM or PM accordingly to select the desired period
Click on the hour value in the display
Move the dial to the time of your choice by drag & drop
Click on the Minutes value in the display
Move the dial to the time of your choice by drag & drop
Click OK to validate
View Asset Listings
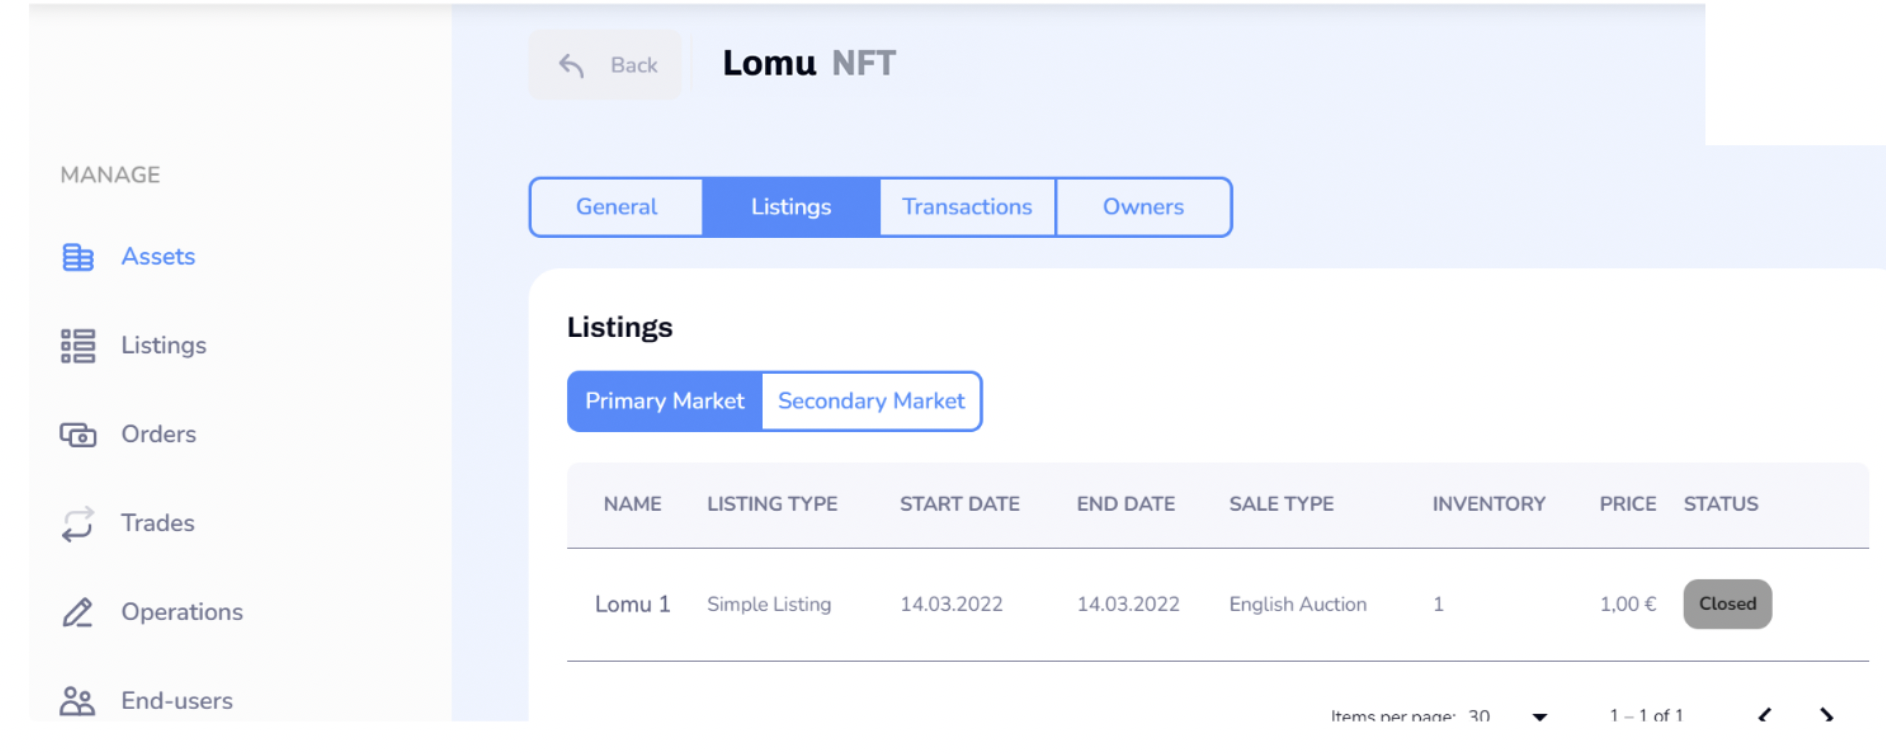
In your Asset Details page, you can click on the Listings tab to see the listings your selected Asset is included in.
Use the Primary Market or Secondary Market tab above the list to display information about the Listings your Asset is included in on your Primary Market or, if it has already been purchased bay an end-user and is being auctioned again, on the Secondary Market.
The resulting page displays the following information for the Listings:
Information | Description |
|---|---|
Name | Name of Listing |
Start Date / End Date | Start and End times for your listing sale |
Sale Type |
|
Inventory | Total inventory for the Listing |
Price | Starting/Fixed Price of Listing |
Status |
|
You can click on the Listing in the List to open the Listing details page, which is also accessible from the Listings page see
View Asset Transactions History

Click on the Transactions tab to see the history of all Transactions related to the Asset.
For all Transactions, you can track the following information:
Information | Description |
|---|---|
Date | Date on which the Transaction was registered |
Origin | The Transaction can originate from either the Primary or the Secondary Market |
Asset Symbol | Ticker Symbol of the Asset related to the Transaction |
Asset ID | ID of the Asset |
From | Sending Account Name |
To | Destination Account Name |
Price | Price of the Asset |
Quantity | Number of Assets exchanged |
Value | Value of the Transaction (Asset Price multiplied by Asset Quantity) |
View Asset Owners

You can click on the Owners tab to check the Asset registry, i.e. who owns the Asset.
For all Owners, you can retrieve the following information:
Information | Description |
|---|---|
Account | Account Name of the Owner |
Address | Wallet Address of the Owner |
Account Type | Account Type of the Owner: Personal or Organization |
Quantity | Quantity of Assets owned |
Percentage | Number of Assets owned / total number of Assets in circulation |
Asset ID | ID of the Asset |